Critical file backup process
- Overview
- Tools or equipment
- Step 1: Configure backup computer
- Step 2: Configure flash drive
- Step 3: Unlock flash drive
- Step 4: Gather backup items
- Step 5: Back up files to flash drive
Overview
- This is a guide to my backup process for critical files.
- I follow this process once a month on files that I don’t want to lose.
- This is not a complete backup of my computer or all of my files, but thinks like contacts, password manager items, important spreadsheets, and files in other clouds that I don’t want to lose should my account be accidentally deleted or I get locked out through other means. This is as just-in-case as it gets.
- This is specific to my needs and I’m providing it as an example. You’ll need to fill in the gaps with your own use cases and software.
Tools or equipment
This is not an affiliate link
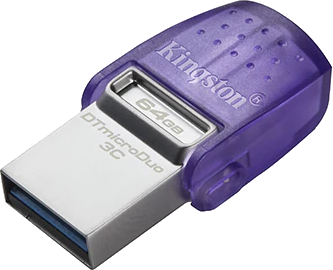
- Kingston DataTraveler microDuo 3C USB Type-C & Type-A Flash Drive - I like this flash drive because it has both USB Type-C and Type-A. This is important because I want to make sure that the data on this flash drive is recoverable when I need it. If the recovery computer I use only has one type of USB port, I’ll still be able to recover my data.
Step 1: Configure backup computer
Install 1Password
The desktop version of 1Password needs to be installed as these actions can’t be done on the web.
- Log into https://1password.com/apps
- Download and install 1Password
- Log in using family 1Password account with personal email
Install Pika Backups
Pika Backups will back up everything that lives in the Home directory. We will just replace these files and Pika will take care of version control.
- Install the Pika Backups package as a flatpak from Flathub in Software
- Configure the Home directory to be backed up
Step 2: Configure flash drive
Formatting the disk
I ended up going with Ext4 (MBR) using LUKS as the file system in Disks.
In Fedora Linux
- Open Disks
- Select the disk on the left
- Click the Additional format options > Format partition
- Erase: Don’t overwrite existing data (Quick)
- Partitioning: Compatible with all systems and devices (MBR / DOS)
- Click Format
- Next until complete
- Name the drive “JUSTIN1” or “JUSTIN2”
Formatting the partition
In Fedora Linux
- Open Disks
- Select the disk on the left
- Click the Additional format options > Format partition
- Volume name: “JUSTIN1”
- Type: Internal disk for use with Linux systems only (Ext4)
- Check the box for Password protect volume (LUKS)
- Click Next
- Paste the password twice from 1Password
- Confirm that data will be wiped
Step 3: Unlock flash drive
- Open 1Password
- Search for and copy the drive password
- Connect already encrypted flash drive to backup computer
- Paste the password when Fedora Linux prompts for it
Step 4: Gather backup items
1Password
- Open 1Password on desktop
- Log in, if you’re not already
- Click the overflow icon (…) > Export > Vault
- Enter your 1Password password
- Select 1PUX
- Click Export Data
- Save the file in
~/Documents - Repeat steps 3 and 7, but select CSV in step 5
Google Drive
- Go to Google Drive
- Click on Starred
- Open and export Docs and Sheets files as OpenDocument types
Files and folders to back up
- [List files to back up here for your future reference]
Google Contacts
- Go to Google Contacts.
- Select all contacts by checking the box next to any contact and in the top left, click Selection Actions > All
- In the top right, click the overflow icon > Export
- Export as: Google CSV
- Click Export
- Move the CSV file from Downloads to Documents
Pleco settings
- Open Pleco on iOS
- Tap the three-lines for the sidebar
- Tap Settings
- Under Backup/Restore, click Backup Settings and/or History > Backup Settings Only
- Tap Save when asked to choose the name
- Tap OK on the success popup
Step 5: Back up files to flash drive
- With the flash drive already connected and unlocked from Step 3
- Open Pika Backups
- Confirm that the destination drive is correct (“JUSTIN1”)
- Click Back Up Now
- Wait for the backup to complete (<5 minutes usually)
- Click the eject icon in Pika Backups
- Close Pika Backups
- Delete all files that you copied to your flash drive as they’re vulnerable if left lying around on your system